Last Wednesday, I was again in need of a break from a bigger project. So, to use up the tiny bit of leftover yarn from my recent Gingerbread Socks, I chose a quick, fun head scarf project.
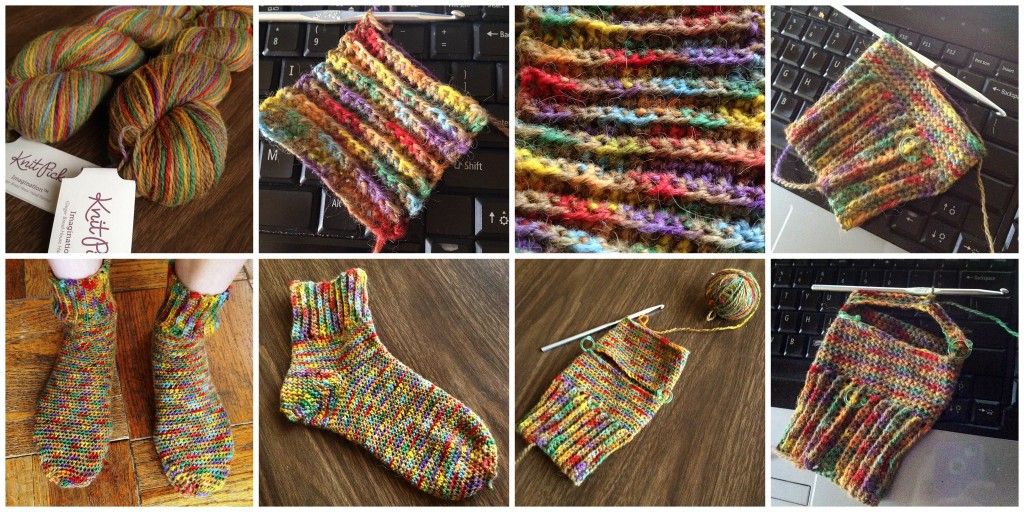
 I used this C's Kerchief pattern, and a size H hook with the leftover Knit Picks Imagination Hand Painted sock yarn in "Gingerbread House". However, as usual, I modified the pattern a bit. I decided to work more rows - 34 instead of 22 - partly because my gauge was slightly small (but I didn’t want to use any bigger hook with this fingering weight yarn) and partly because I was trying to use up this yarn. I only chained 30 for the kerchief's ties though - since the main part was larger, the ties didn’t need to be so long. Also, I single crocheted in the tie chains instead of slip stitching, to make them a bit thicker. Then I decided to go ahead an add a shell border on the sides, since I still had plenty of yarn, to make it look a little more “fancy” - (2dc, ch 2, sc) in same st, slst in next two st, repeat from around. I love this pattern though, it makes a really cute head scarf! And it would also work well as a dog bandanna. :-)
 I used this C's Kerchief pattern, and a size H hook with the leftover Knit Picks Imagination Hand Painted sock yarn in "Gingerbread House". However, as usual, I modified the pattern a bit. I decided to work more rows - 34 instead of 22 - partly because my gauge was slightly small (but I didn’t want to use any bigger hook with this fingering weight yarn) and partly because I was trying to use up this yarn. I only chained 30 for the kerchief's ties though - since the main part was larger, the ties didn’t need to be so long. Also, I single crocheted in the tie chains instead of slip stitching, to make them a bit thicker. Then I decided to go ahead an add a shell border on the sides, since I still had plenty of yarn, to make it look a little more “fancy” - (2dc, ch 2, sc) in same st, slst in next two st, repeat from around. I love this pattern though, it makes a really cute head scarf! And it would also work well as a dog bandanna. :-)